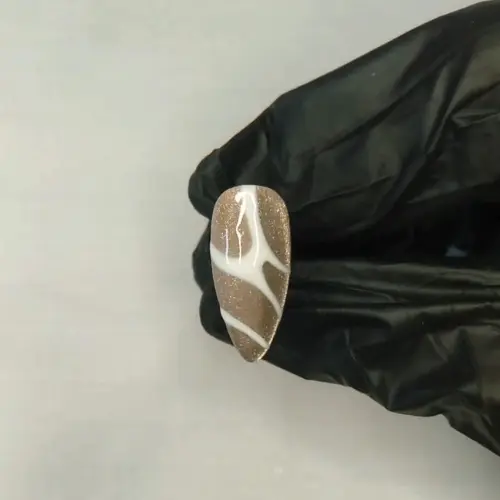
Looking for a chic and elegant nail design that stands out? This gold and white swirl nail art is the perfect combination of glam and sophistication. The gold base adds a touch of luxury, while the white swirls give it a modern, artistic flair. Whether you’re a beginner or a pro, this design is easy to recreate with the right tools and techniques.
Follow this detailed step-by-step tutorial to achieve this stunning look. Plus, don’t miss the embedded YouTube short below for a visual walkthrough!
What You’ll Need
Before you start, make sure you have the following items:
✅ Gold glitter nail polish (for the base)
✅ White nail polish or gel (for the swirls)
✅ Fine nail art brush
✅ Top coat (for a long-lasting finish)
✅ UV/LED lamp (if using gel polish)
✅ Cuticle pusher and nail file
Step-by-Step Tutorial
Step 1: Prep Your Nails
- Start by shaping your nails with a nail file to your desired length and shape.
- Push back and trim any excess cuticles for a clean base.
- Buff the surface of your nails to remove any shine.
Step 2: Apply the Gold Glitter Base
- Apply a thin layer of base coat and cure under a UV/LED lamp (if using gel).
- Once dry, apply two coats of gold glitter nail polish for a rich, vibrant finish. Let it dry completely.
Step 3: Create the White Swirls
- Dip a fine nail art brush into white polish.
- Carefully draw curved swirl lines across the nail.
- Keep a steady hand and work slowly for precise swirls.
- Cure under a UV/LED lamp (if using gel).
Step 4: Seal the Design
- Once the swirls are dry, apply a layer of top coat to seal the design and add shine.
- Cure under the lamp (if using gel).
Step 5: Clean Up Edges
- Use a clean brush dipped in nail polish remover to clean up any excess polish around the cuticles.
Watch the Full Tutorial
For a detailed visual guide, check out the embedded YouTube short below! Watching the video will help you master the swirl technique and perfect the final look.
Tips for Perfect Swirls
✔️ Use a thin brush for better control over the swirls.
✔️ If the swirls aren’t smooth, clean the brush and try again.
✔️ Apply thin layers to avoid a bulky finish.
Why You’ll Love This Design
✨ The gold glitter adds glamour and catches the light beautifully.
✨ The white swirls create a modern contrast that complements any outfit.
✨ It’s versatile enough for casual and formal occasions.
Conclusion
This gold and white swirl nail art is perfect for adding a touch of elegance to your look. Whether you’re preparing for a night out or just want to elevate your everyday style, this design will make your nails stand out.
Don’t forget to watch the video tutorial above and try it out yourself! If you loved this design, share your results in the comments or tag us on social media.
Yes! Just make sure to let each layer dry fully before adding the next.
With a gel top coat, it can last up to 2 weeks without chipping.
Absolutely! Try silver, nude, or even pastel shades for a fresh twist.


