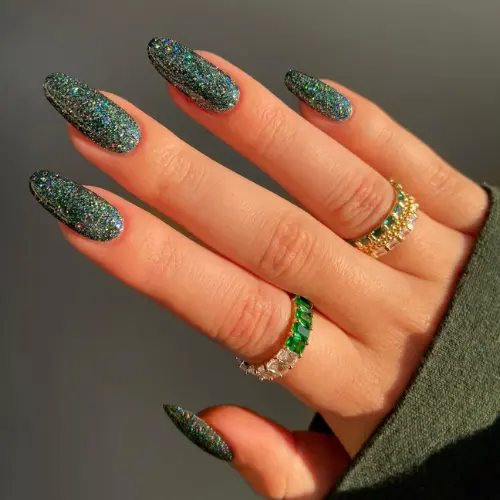
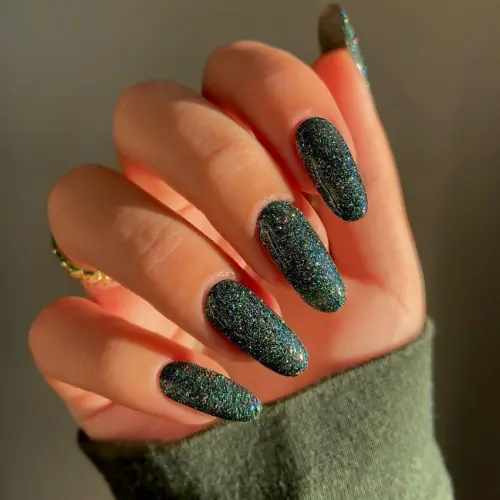
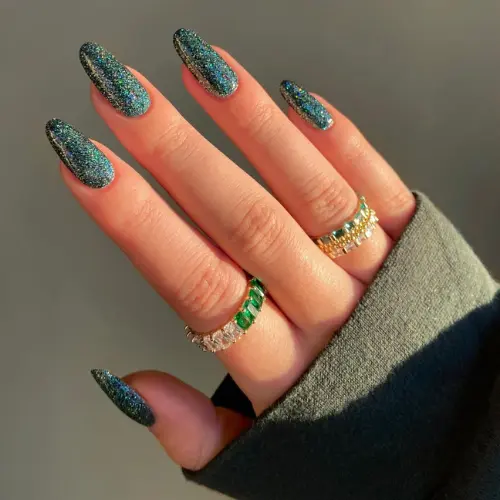
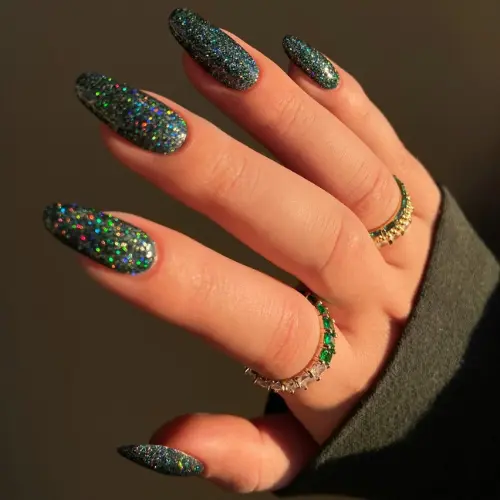
If you’re looking for a bold, eye-catching nail design, green glitter nail art is the perfect choice! This look combines rich emerald hues with multi-dimensional glitter that reflects light beautifully, making your nails the center of attention. Whether you’re dressing up for a special occasion or just want to add some sparkle to your everyday style, green glitter nails are a versatile and stunning option.

In this guide, I’ll walk you through how to recreate this dazzling green glitter nail art at home. Plus, I’ll share pro tips to help you achieve a flawless finish that lasts!
What You’ll Need
To recreate this green glitter nail art, gather these essentials:
✅ Green glitter nail polish (or green polish + loose glitter)
✅ Base coat
✅ Top coat (for a high-gloss finish)
✅ Fine brush (for detailing)
✅ Nail file and buffer
✅ Cuticle pusher and cuticle oil
Step-by-Step Guide
Step 1: Prep Your Nails
- Start by shaping your nails with a nail file into your desired shape (almond, coffin, square, etc.).
- Push back and trim your cuticles for a clean and polished look.
- Buff the surface of your nails to remove any shine and create a smooth base.
Step 2: Apply the Base Coat
- Apply a thin layer of base coat to protect your natural nails and help the polish adhere better.
- Let it dry completely before moving on to the next step.
Step 3: Apply the Green Glitter Polish
- Apply the first coat of green glitter polish evenly across your nails.
- Let it dry, then apply a second coat to intensify the color and sparkle.
- If using loose glitter, apply a clear polish and gently sprinkle the glitter over your nails while it’s still wet.
Step 4: Seal with Top Coat
- Once the polish is dry, apply a high-gloss top coat to seal the design and prevent chipping.
- This step will also give your nails a smooth and shiny finish.
Step 5: Clean Up Edges
- Use a small brush dipped in nail polish remover to clean up any polish that may have gotten on the skin around your nails.
Tips for a Perfect Finish
✔️ If using loose glitter, press it down gently with a silicone tool or fingertip to ensure it sticks well.
✔️ Apply thin layers of polish to avoid bubbling or uneven texture.
✔️ Let each layer dry fully before moving to the next step to prevent smudging.
✔️ For extra shine, apply a second layer of top coat after a day or two.
Why Green Glitter Nails Work So Well
💚 Bold and Unique: Green glitter adds a rich and luxurious touch to any look.
💚 Perfect for Any Season: This design works for holiday parties, summer nights, or even casual outings.
💚 Easy to Customize: You can adjust the glitter density or mix shades of green to create a more personalized look.
Conclusion
Green glitter nail art is a bold statement that’s surprisingly easy to create at home. The combination of rich green tones and sparkling glitter makes it a versatile design for any occasion.
Try it out and let your nails steal the spotlight! If you loved this look, share your results in the comments or tag us on social media. 🌟
FAQs
With a gel top coat, it can last up to 2–3 weeks without chipping.
Yes! Just make sure to apply a strong top coat to increase durability.
Soak a cotton pad with acetone, place it on your nail, and wrap it in foil for about 5–10 minutes. The glitter will slide off more easily.